Code Sharing Between Devices
This guide will help you to set up GitHub as a way to share code between multiple devices, without having to copy and paste code back and forth.
In this guide:
Prerequisites:
- If you are a Windows user, then I highly recommended that you install and set up Windows Subsystem for Linux (WSL) first. The guide for installing WSL can be found here.
Part 1: Creating a GitHub repository
This part will help you to sign up for a GitHub account and create a repository.
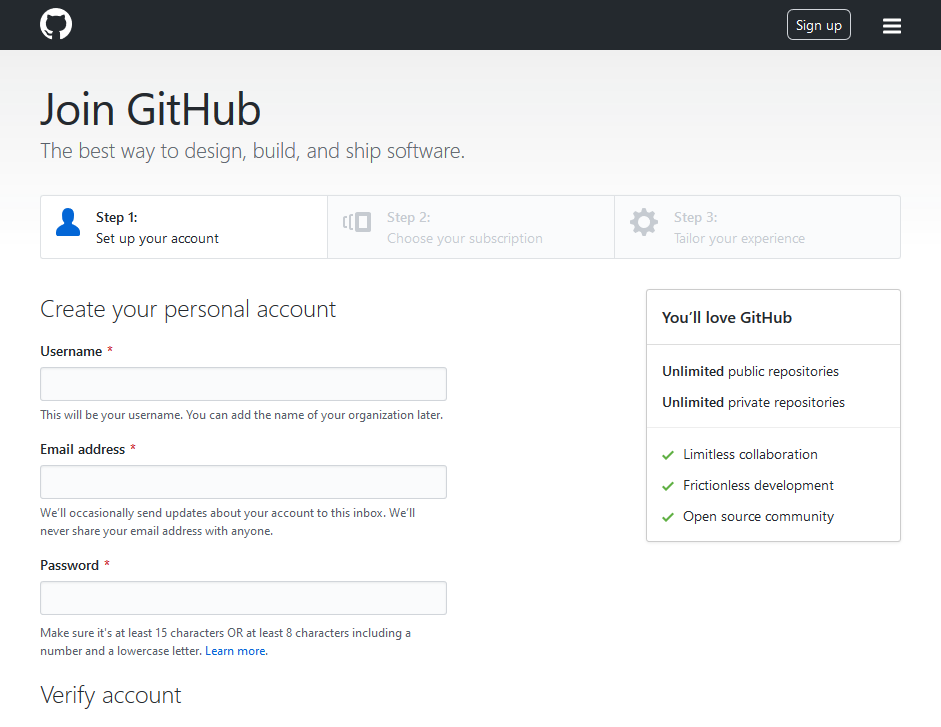
If you don't already have a GitHub account, go to https://github.com/join and sign up with an appropriate username, email and password. I recommend using your UNSW email.
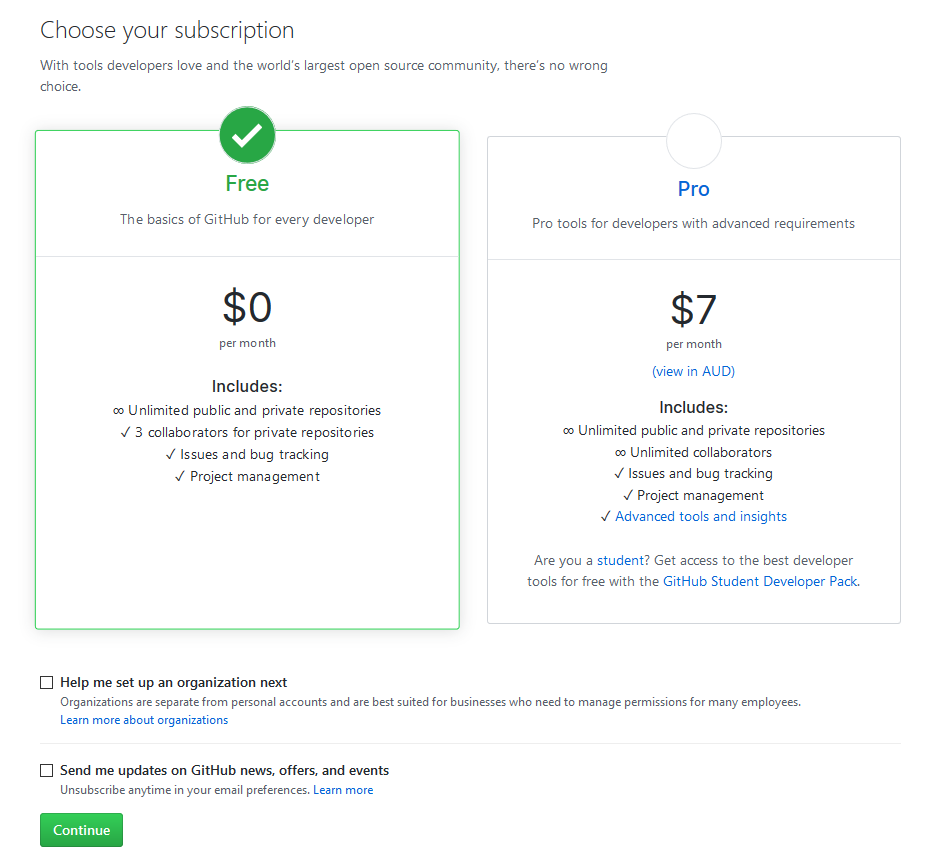
On the next screen, you'll be prompted to choose your subscription. The Free subscription is sufficient for our needs, so you can simply click on Continue at the bottom. You may also follow the instructions to get the GitHub Student Developer Pack if you wish.
On the next screen, answer the questions and then click on Submit. You don't need to answer the questions, but it shouldn't take longer than a minute.
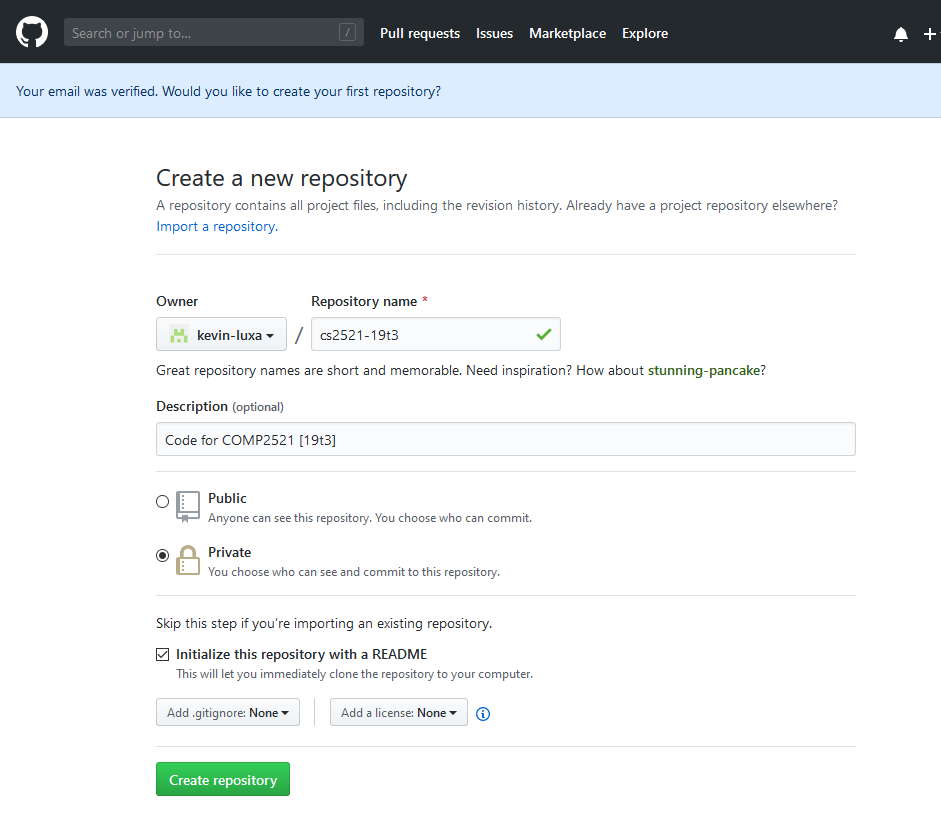
If you haven't already verified your email address, you'll be asked to do so. After you've done this, you might also be asked to create your first repository. A repository is like a folder where you store all the code related to your project. In our case, we want to create a repository to store all of your COMP2521-related code. Give your repository an appropriate name, click on Private, check the box next to Initialise this repository with a README, and then click Create repository.
If you already had a GitHub account, then you can create a new repository by either clicking on the plus icon on the navigation bar and then clicking New repository, or by clicking on the Repositories tab and then clicking on the New button (you probably already know this).

Congratulations! You've just created your first GitHub repository. You'll be using it later to store all of your COMP2521 code.
Part 2: Setting Up an SSH Key
This part will help you to set up an SSH key, which will enable you to easily push and pull code to and from GitHub.
There is a guide on how to set up an SSH key on GitHub. The sections you should follow are: Checking for existing SSH keys, Generating a new SSH key and adding it to the ssh-agent, Adding a new SSH key to your GitHub account, and Testing your SSH connection. You should set up an SSH key on both your local machine and your CSE account.
Note for WSL users: If you are setting up an SSH key on WSL, make sure you follow the instructions in the Linux tabs, not the Windows tabs.
Here are some screenshots from setting up an SSH key on WSL:
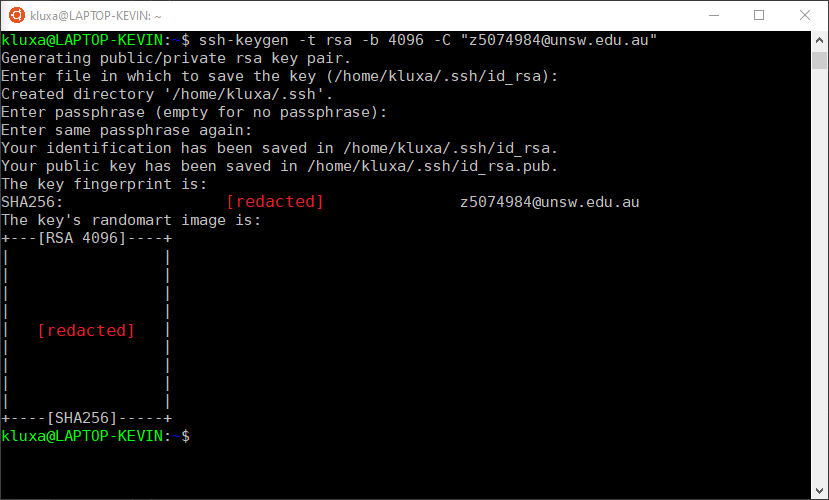
1. Generating a new SSH key (obviously, replace the email with your own email)
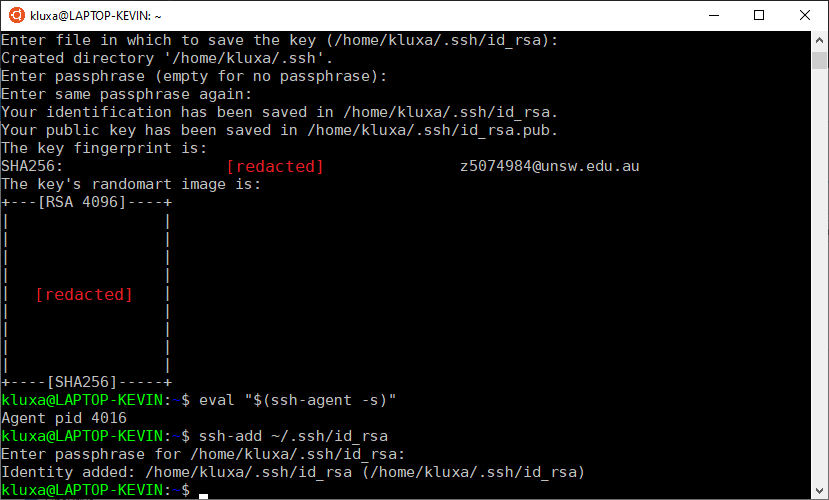
2. Adding the SSH key to the ssh-agent
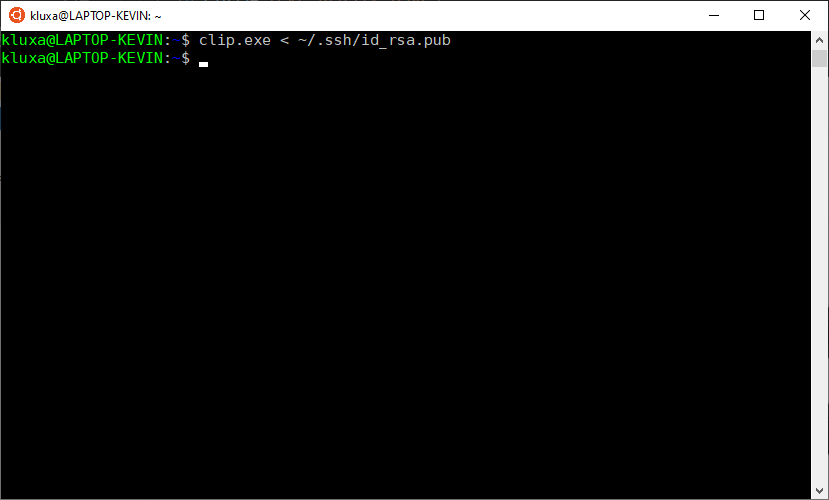
3. Copying the SSH key to the clipboard
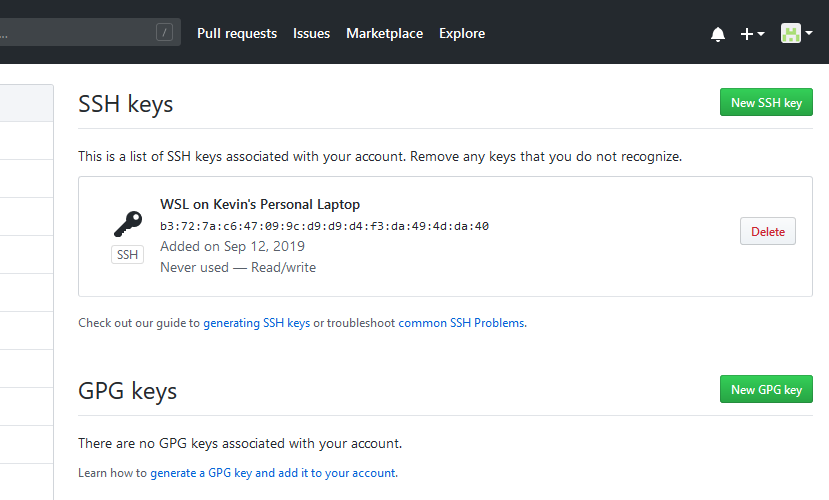
4. After adding the SSH key to GitHub
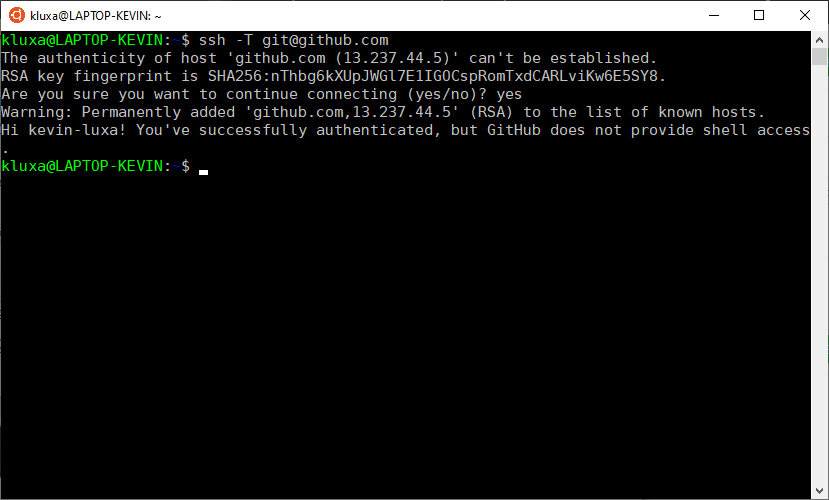
5. Testing the SSH connection
Here are some screenshots from setting up an SSH key on CSE (it's almost exactly the same as for WSL):
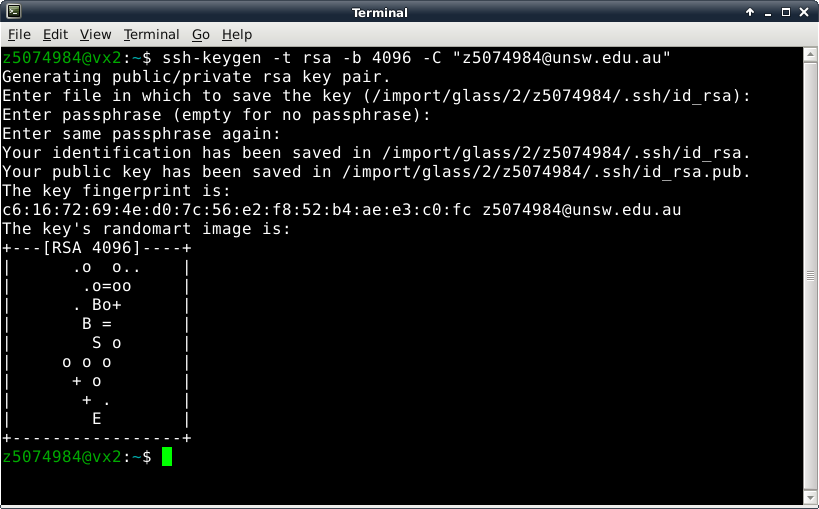
1. Generating a new SSH key (obviously, replace the email with your own email)
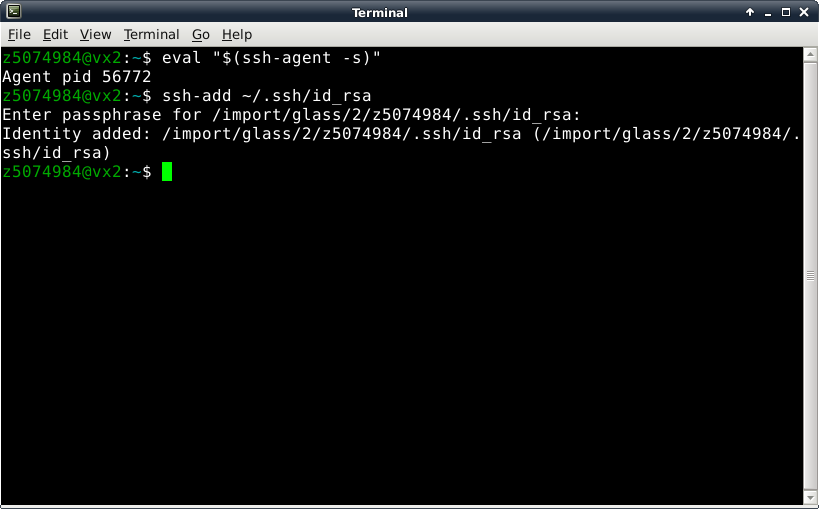
2. Adding the SSH key to the ssh-agent
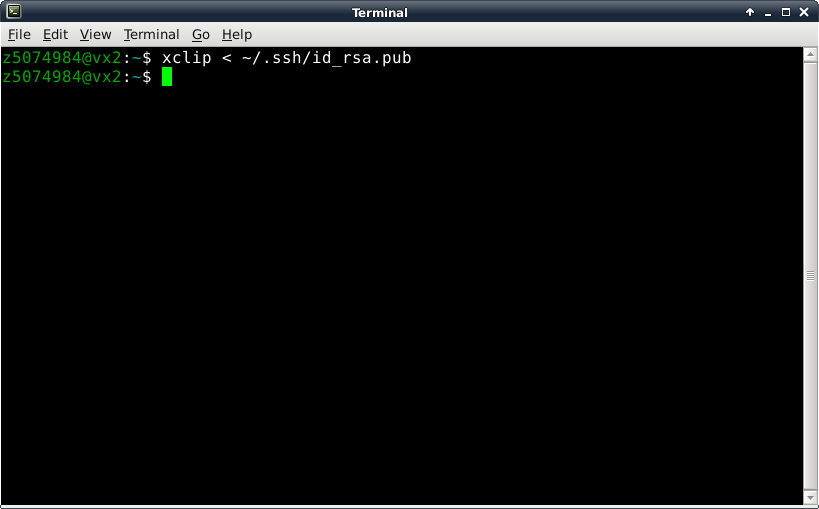
3. Copying the SSH key to the clipboard
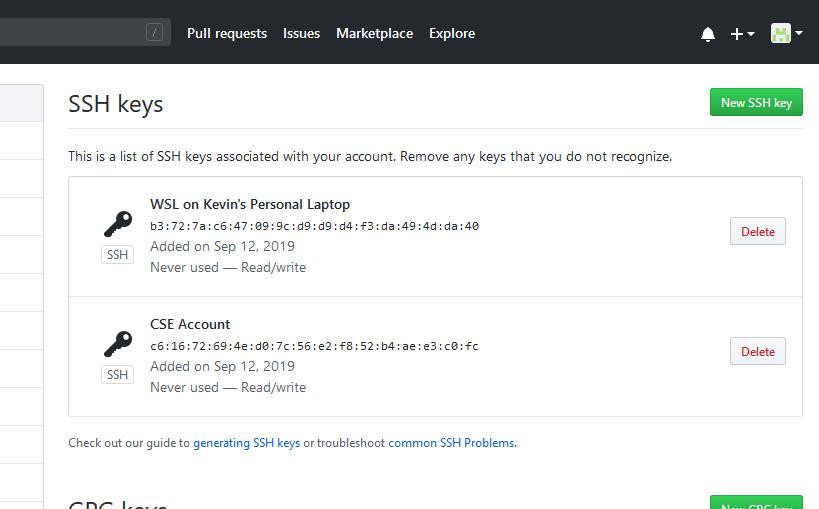
4. After adding the SSH key to GitHub
Working with SSH Key Passphrases
Currently, whenever you push (i.e., upload) your code to GitHub or pull (i.e., download) code from GitHub, you will be asked to enter your SSH key passphrase, which can become tedious. After following these steps, you'll only need to enter your passphrase once (per reboot).
On Mac
Mac users can simply follow the instructions under the Mac tab on this page. (From the looks of it, you don't have to do very much, if anything.)
On WSL
WSL users should add the following lines to the end of their ~/.bashrc file. ~/.bashrc is a hidden file, so you won't be able to see it by just typing ls - you'll need ls -al to see it. Use VIM to add the lines.
env=~/.ssh/agent.env

agent_load_env () { test -f "$env" && . "$env" >| /dev/null ; }

agent_start () {
	(umask 077; ssh-agent >| "$env")
	. "$env" >| /dev/null ; }

agent_load_env

# agent_run_state: 0=agent running w/ key; 1=agent w/o key; 2= agent not running
agent_run_state=$(ssh-add -l >| /dev/null 2>&1; echo $?)

if [ ! "$SSH_AUTH_SOCK" ] || [ $agent_run_state = 2 ]; then
	agent_start
	ssh-add
elif [ "$SSH_AUTH_SOCK" ] && [ $agent_run_state = 1 ]; then
	ssh-add
fi

unset env
On CSE (i.e., Linux)
You'll need to follow the same instructions as for WSL (except you can use a text editor like gedit or VSCode to add the lines).
Below are some screenshots of the process on WSL and CSE:
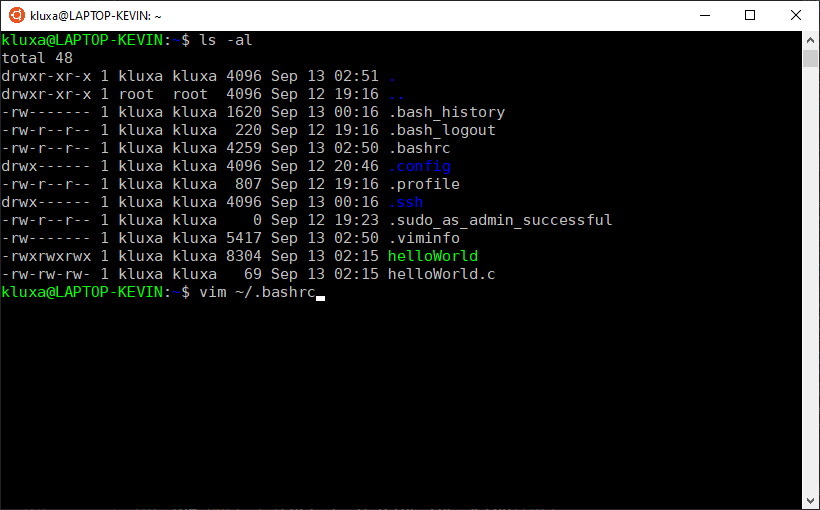
1. On WSL, using ls -al to reveal ~/.bashrc, and opening ~/.bashrc with VIM
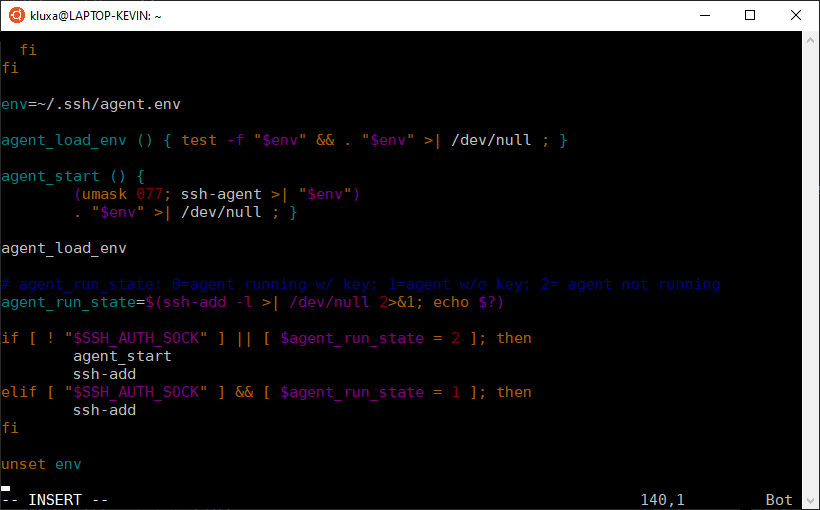
2. On WSL, adding the given lines to the end of ~/.bashrc
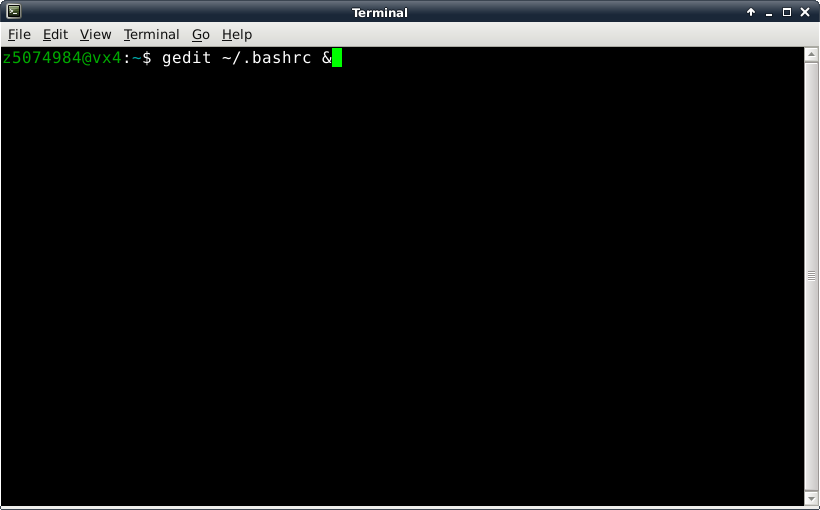
3. On CSE, opening ~/.bashrc in gedit
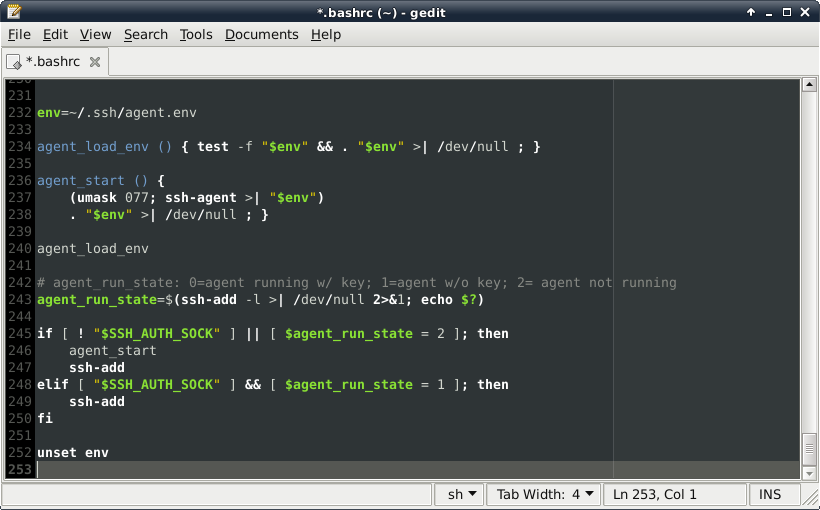
4. On CSE, adding the given lines to the end of ~/.bashrc
Now, you will only be prompted for your SSH passphrase the first time you open a terminal. Hooray!
Note that if you don't need SSH in a particular session, you can avoid entering your passphrase by simply typing Ctrl+C when you are prompted for it.
Part 3: Using GitHub
In this part, you'll learn how to use the basic Git commands to transfer code between your devices via GitHub.
Git is a version-control system, which enables developers to track changes during software development. Basically, it keeps track of snapshots of your code during development. Meanwhile, GitHub is a web interface to Git that includes many of its own features. We're only going to be using GitHub to reduce the hassle of transferring code.
So far, we've created a repository on GitHub. Now, we want each of our devices (say, our local machine and our CSE account) to have a copy of the repository. This is called cloning.
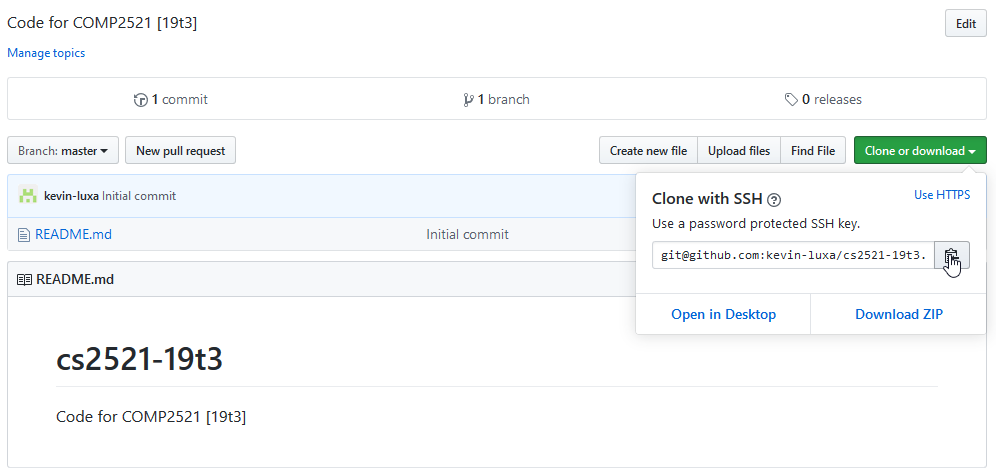
Go to the GitHub repository you created in Part 1. Click on Clone or download and copy the SSH URL. (If the box says Clone with HTTPS then first click on Use SSH in the top right.)
Now, on your terminal, navigate to where you want the repository to be stored and use git clone <ssh url>, where <ssh url> is the SSH URL you just copied. This will download a copy of the repository. Then, go into the repository directory. For example, on WSL:
$ cd /mnt/c/Users/YourName/Documents
$ git clone git@github.com:username/repository-name.git
Cloning into 'repository-name'...
...
$ cd repository-name
$ ls
README.md
Repeat this on each device where you plan to do COMP2521 work. After you are done, each of your devices should have a copy of the initial version of the repository.

Great! Now, let's make some small changes for demonstration purposes. Create a file called helloWorld.c and add a bit of code to it. Also add a line (containing anything you want) to README.md.
Suppose you now want to save a snapshot of your current files. (The technical phrase is that we want to make a commit.) To understand how to do this, we need to dive a little deeper into how Git works.
Detour: Basics of Git Internals
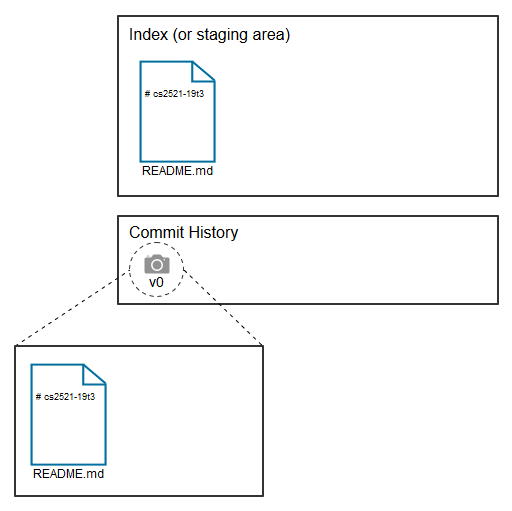
A Git repository is composed of two main parts that are relevant to us - the index and the commit history. The index, also known as the staging area, is where you assemble your files to make commits, which are snapshots of the index at various points in time. Meanwhile, the commit history is where the commits are actually stored. Currently this is the state of our Git repository:
(If you're wondering where all of this is actually stored, it's in a hidden directory called .git. You can poke around in there, but don't change anything.)
Here are some observations that we can make:
-
v0is the initial commit of our repository. It contains onlyREADME.md, which makes sense because when we first created our repository in Part 1, it consisted of only that file. -
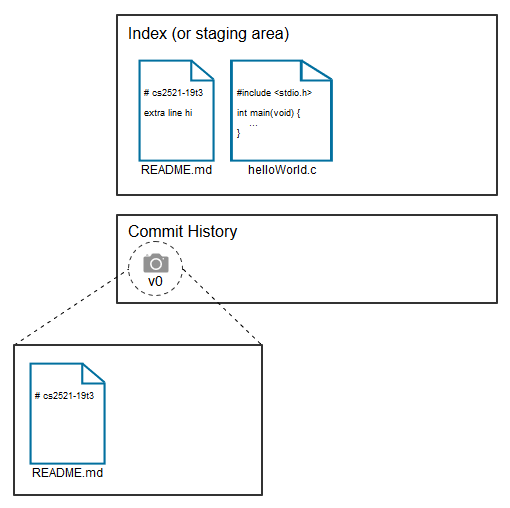
The index contains
README.md, but nothelloWorld.c, which is the file that we just created. Also,README.mdin the index does not contain the extra line that we added. This is because we haven't added our changes to the index.
To add our changes to the index, we can use the git add command. We can either add the files individually:
$ git add helloWorld.c
$ git add README.md
...or we can add all of the changes at once:
$ git add -A
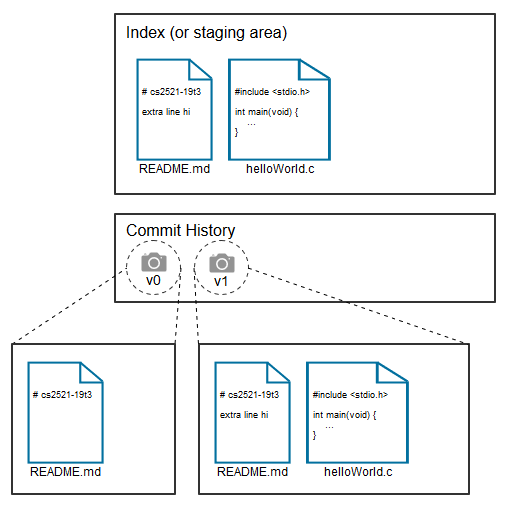
Now, our changes will be added to the index, like so:
Note that v0 doesn't change, as it is a snapshot of the index at a previous point in time - we can't change it.
Now, we are ready to make the commit, that is, take a snapshot of our index. The command to do this is git commit -m "commit message". For example:
$ git commit -m "added helloWorld.c"
This saves the current state of the index in the commit history, so now we have a new commit:
To be continued...